Create and configure a document
Use the Flowize Document editor to create a document from a layout, arrange content in its print areas, and test the output before publishing. You can add text, images, tables, and other elements, apply conditions, and configure accessibility settings.
Find or create a document
The Documents overview lists documents with their preview, name, status, tags, creation and update information, and available actions.
To create a document:
- Select New document at the top of the page.
- In Information, enter the required Name. Add a Description if needed.
- Select Next.
- Choose a layout, or select New layout to create a new one in a popup window.
- Select Create to open the document in the editor.
Configure the document
Select the gear icon above the canvas to open General Settings. In Configuration, you can edit the name and description, select the document layout, and set the document's text style.
Custom font families
Upload a custom font family to make its styles available in the Family selector. Custom font families are saved at the project level and can be reused by documents and custom components in that project.
Use an unversioned document or a draft when changing document styling. Published versions are read-only; see Versioning.
Upload a font family
- Open General Settings and select Configuration.
- Expand Text Style.
- Select Add Font Family beside Family.
- In Upload Custom Fonts, enter a unique Name.
- Select Browse under Style Normal and upload a
.ttffile. This style is required. - Upload separate
.ttffiles under Style Bold, Style Italic, and Style Bold Italic if needed. - Wait for each upload to finish and check the displayed filenames, then select Save.
Save remains disabled until you enter a name and upload the normal font. To replace an uploaded file before saving, use the remove control beside its filename, then select Browse again.
Select the saved family in Family to use it in the document's text style or an element's font settings. Upload the matching variants for the styles you plan to use, then test the PDF output.
Edit a custom font family
Select the custom family in Family, then select Edit Font Family beside the selector. Change the name or replace the uploaded style files, then select Save. The normal font remains required.
Edit Font Family is disabled for built-in fonts. Editing a custom family updates the shared family for the project; add a new family if you need to keep the original font files unchanged.
Custom color set
Use Custom color set to maintain a reusable list of colors for the editor's color pickers. Custom colors are saved at the project level. Each entry has a hex color and can include a name and CMYK values.
Add or edit saved colors
- Open General Settings, select Configuration, and expand Text Style.
- Select the swatch beside Colour to open the color picker.
- Select the plus button in the picker to open Custom color set.
- Enter a Color name to identify the swatch. Choose its color with the swatch control, or enter a hex value such as
#336699in the adjacent field. - If you need a CMYK mapping, enter it in C, M, Y, K as described below.
- Select Add color for each additional entry. Edit existing entries directly, or use an entry's trash button to remove it.
- Select Save. Reopen the color picker and select a saved swatch to apply its color.
Hex values must start with # followed by six hexadecimal characters. Each saved hex value must be unique. A new entry without a hex value is not saved.
Saving updates the entire color set, including any entries you removed. Saving a font family or color set saves that resource separately from the document. Save the document after changing its styling.
Enter CMYK values
CMYK values are optional. Enter them manually in cyan, magenta, yellow, and black order. Choosing a hex color does not fill in CMYK values.
Use four whole numbers from 0 to 100, separated by commas or semicolons. For example, 0, 100, 100, 0 is a valid entry. Do not include percent signs or decimal values.
To inspect the PDF with CMYK output enabled, select Test PDF, open Preview Options, and enable CMYK colours. For the full preview workflow, see Test the PDF output.
Font and color errors
| Message or issue | What to do |
|---|---|
| The name of the Font Family already exists | Enter a different family name, or select the existing custom family and edit it. |
| The Font Normal is mandatory | Upload a file under Style Normal. |
| File not found | Remove the affected upload and upload the font file again. |
| A font upload fails | Use a non-empty .ttf file. If the upload reports that the file is too large, use a smaller file within the reported limit. |
| One or more colors are not a valid hex color | Enter # followed by six hexadecimal characters. |
| One or more colors are not a valid CMYK color | Enter four whole numbers from 0 to 100, separated by commas or semicolons, or leave the CMYK field empty. |
| The Hex color is not unique. | Use a different hex value or edit the existing color entry. |
| User Unauthorized | Ask your organization administrator to check your project access and authorization to manage document fonts and colors. |
Arrange content on the canvas
The builder displays the document canvas and its print areas. Use the Elements tab in the Tools panel to add content.
| Group | Elements |
|---|---|
| Basics | Text, Table, Image, PDF, Spacer, New page |
| Layouts | Section |
Available elements
| Element | Description |
|---|---|
| Text | Add and format text. |
| Table | Display data in rows and columns. |
| Image | Add an image, including alternative text and an optional link. |
| Insert PDF content into the document. | |
| Spacer | Add adjustable space between elements. |
| New page | Insert a page break. |
| Section | Group and organize elements within the layout. |
Drag an element to a print area on the canvas. For example, add a Section and then add Text elements inside it.
Components
Custom components are reusable, versioned blocks that contain document elements. Add a component to a document when you want to reuse the same content structure in more than one document.
Find a component
- In the document editor, open the Tools panel.
- Select the Components tab.
- Use All Types to filter the list or use Search to find a component.
Each component card shows the component name, its date, and whether it is used in PDFs. A label identifies the version of the component when it has multiple versions.
To check where a component is used, select its usage information. Flowize opens Where is this component used?, which lists the documents that use the component.
Add a component to a document
Drag a component from the Components list to a print area on the document canvas. The component appears as a block with its component name and status. Its elements remain grouped inside the component block.
Edit a component
To edit the reusable component, select its edit control from the component list or select Edit component on an inserted component. Flowize opens the component editor in a separate window.
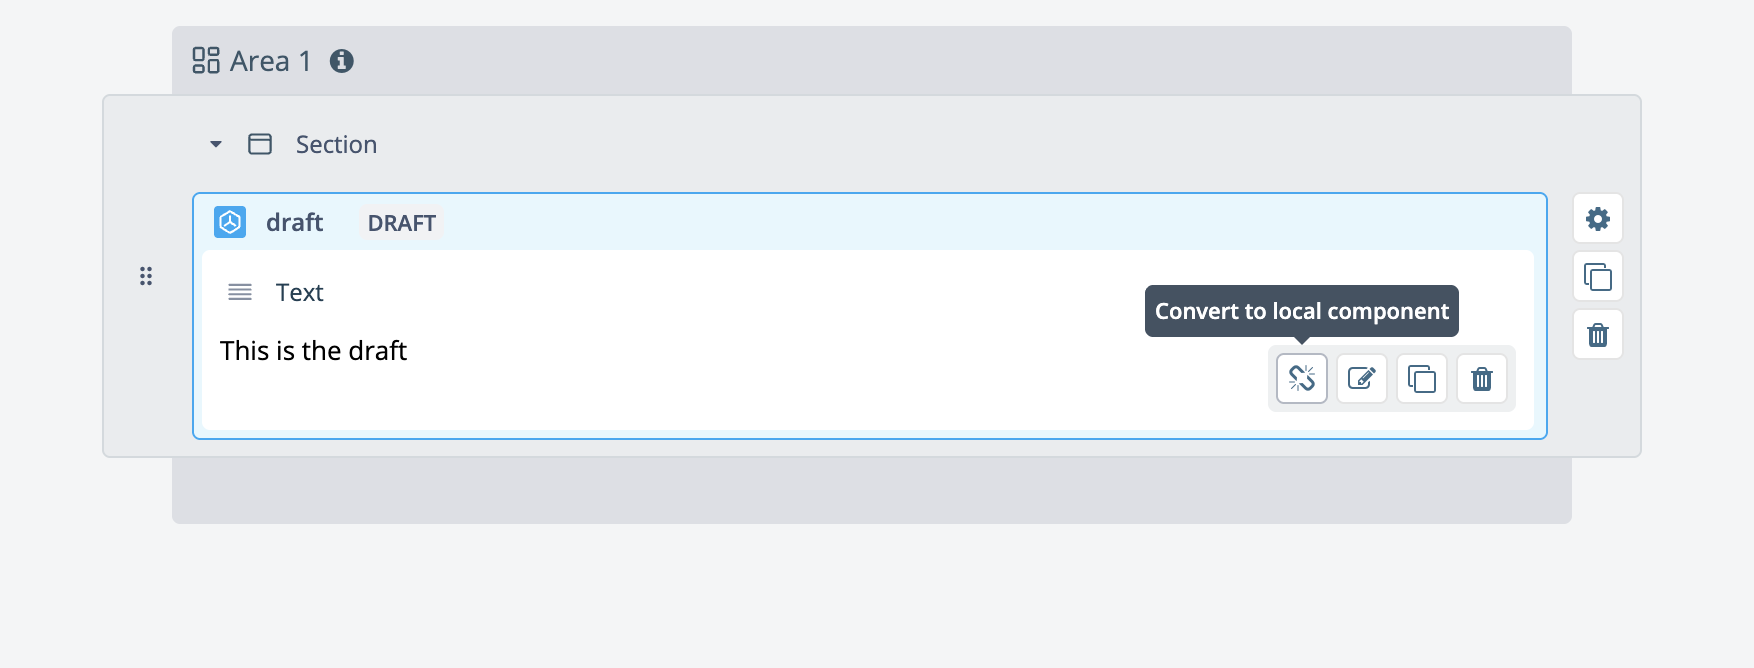
Convert to local component
Convert a component to a local version when you need to customize this document instance without changing the other instances of the component.
- Select the component block on the document canvas.
- Select Convert to local component in the component actions.
- Review the confirmation message. Changes made to the local version will not affect other instances of the component in the application.
- Select Convert.
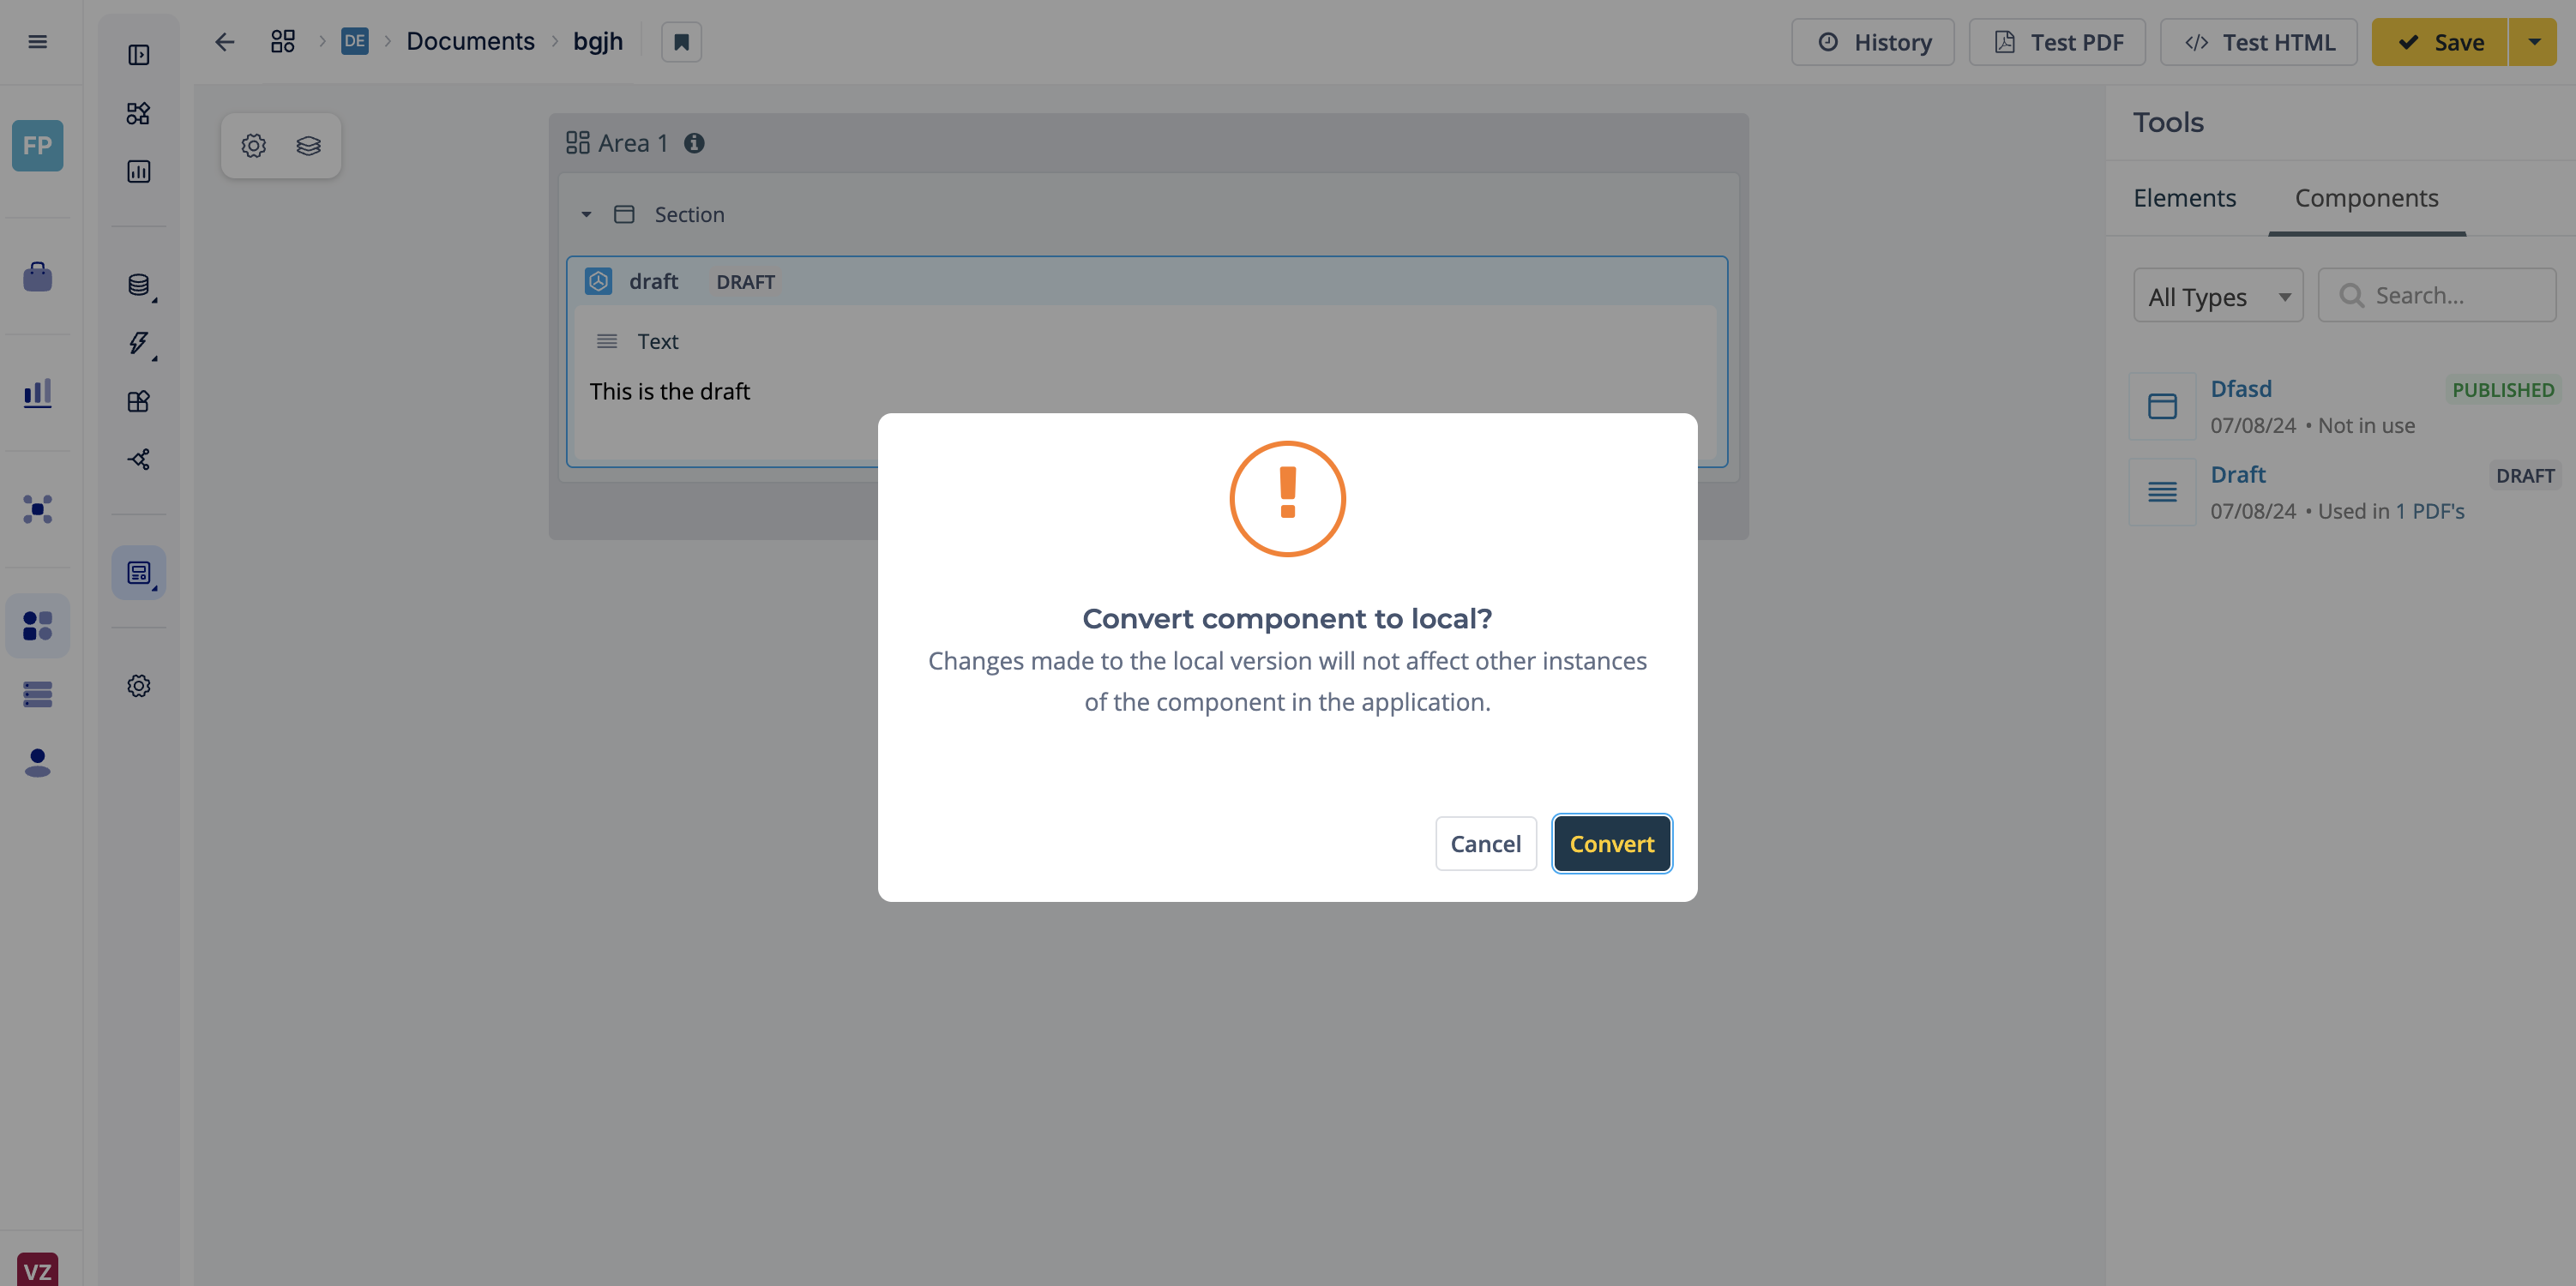
Flowize replaces the shared component with local content in the document. You can then edit the local elements directly; changes apply only to this document instance.
Configure element settings
Open an element's Settings control, then select Element settings. The available settings depend on the element type. For a section, use its Settings control to configure the whole group.
Use an unversioned document or an editable draft. Published versions are read-only; see Versioning.
Users with the Content Editor, Project Admin, or Full Admin role can create, view, edit, and delete documents in projects they can access. A Content Editor with tag restrictions can edit or delete a document only when it shares at least one of their assigned tags. Without tag restrictions, a Content Editor can manage documents throughout the project. See Roles and restrictions for details.
Select Apply to apply changes to the canvas, then select Save in the document toolbar to keep them. Use Cancel to close the settings without applying the changes.
Repeat a section from an array or query
Use a repeating Section when a group of elements needs to appear once for each array item or query result. For example, a section can contain the text and images for each item in a list.
- Add a Section to a print area and place the elements to repeat inside it.
- Open the section's Settings and select Element settings.
- Expand Section behaviour and enable Grow with array.
- Choose the source:
- Variables: enter a variable or expression that resolves to an array. Use Add Variables to select a variable or Add Macro to build an expression.
- Queries: select a saved query. Use Add Query if you need to create one.
- Configure the content inside the section with the variables it needs. See Variables for the variable selector and notation.
- Select Apply, then Save.
- Select Test PDF and choose a data record that supplies the array or the values used by the query.
With a data record selected, the section repeats according to the number of array items or query results. An empty array, a value that does not resolve to an array, or a query with no results produces no content inside the repeating section.
Repeating sections need a data record. No data record does not exercise section repetition. Test with representative records before publishing.
Switching between Variables and Queries clears the other source. Turning off Grow with array clears both source settings. Select the source again if you re-enable repetition.
Configure a table
Open a Table element with Edit, then select Edit table. Select the table settings control, a row selector, a column selector, or a cell to display its settings.
| Settings | What you can configure |
|---|---|
| Table Settings | Text alignment, background, borders, and header and footer rows. |
| Row Settings | Row height, text alignment, background, borders, repetition, and conditions. |
| Column Settings | Column width and text alignment. |
| Cell Settings | Cell content, size, text style, background, padding, borders, and a hyperlink. |
Use the row menu to insert, duplicate, or delete rows. Use the column menu to insert or delete columns.
Under Table Settings, expand Header and footer and set Header and Footer to the number of rows to use for each. The selectors offer up to five rows each. The available counts depend on the table's rows, and at least one body row must remain.
Select Apply, then Save after configuring the table.
Repeat a table row
To repeat a single row instead of a whole section:
- Open the table's Edit table tab.
- Select the row to repeat to open Row Settings.
- Expand Row Behaviour and enable Grow with array.
- Choose Variables and enter an array variable, or choose Queries and select a saved query.
- Enter the values to display in the row's cells.
- Select Apply, then Save, and test the PDF output with a suitable data record.
For example, if a data record contains an array named items with a name field in each item, use @data.items.*@ as the row's Variables value and @data.items.name@ in a cell. The row displays the name from each item.
Keep column headings in separate header rows when you want to repeat only the data row. A query with no results produces no copies of the configured row.
Show content conditionally
Expand Conditions in Element settings and select the condition that must be met for the element to appear. A section condition controls its contents; for a repeating section, the condition is evaluated for each repetition.
To set a condition on a table row, select the row in Edit table, then expand Conditions under Row Settings. To control the entire table, use Conditions in the table's Element settings.
Use Add Condition to create a condition or Edit Condition to change the selected one. See Conditions for rule configuration and the effect of changing shared conditions. Editing and other actions for a selected condition are disabled until you select one.
Select Apply, then Save. Test with data records that meet the condition and records that do not. If an element is missing, check both its own condition and the condition on its containing section.
Control page breaks
The Text, Table, Image, PDF, and Spacer elements include Page Behaviour in Element settings.
| Option | Purpose |
|---|---|
| Avoid splitting over pages | Request that the element stays together instead of splitting across pages. |
| Keep with previous block | Request that the element stays with the preceding block. |
| Keep with next block | Request that the element stays with the following block. |
Use a New page element when you need an explicit page break. You can apply a condition to that element to make the break conditional.
Select Apply, then Save, and inspect Test PDF with enough content to reach a page boundary. Page formats and print areas come from the document's layout.
Troubleshoot element settings
For missing repeating content, unsaved settings, and document access or saving errors, see PDF element settings troubleshooting.
Document accessibility
To configure accessibility settings, open Document General Settings and Element settings. Select the Accessibility tab to edit the available options.
Open Navigation and enable Modify screen reader order to adjust the screen reading order. More info about reading order
Test the PDF output
Select Test PDF to open the embedded PDF viewer and inspect the generated document. Use the data-record selector to choose an existing data record for the preview, or select No data record to preview without one.
Open Preview Options to access:
- Debug mode.
- CMYK colours.
- PDF compliance, with options such as 1.6 (corresponds to Acrobat 7).
Inspect the output after changing content, styling, or conditions. If expected content is missing, review the conditions applied to its section and the selected data-record setting.
Preview an HTML layout
A layout can be configured using HTML. When a document uses an HTML layout, select Test HTML to view its HTML preview. Layout configuration will be covered in the dedicated layouts article.
Was this article helpful?