This is an example of how to create a website in Flowize. We need to do the following steps to accomplish our goal of creating a website with this example:
Step-1: Select website template
To create a website, you need a template. If you already have a template for your project, you can use that one. If you do not have one, you can download or Buy it. I am going to use a free template that I found from: https://bootstrapmade.com/lumia-bootstrap-business-template/download/
You need to always use a zip file with all your files(HTML, CSS, Assets) together.
Step-2: Setting up a project
First, right-click on your organization ( access it by clicking the top left corner) and click Add Project. (if you already have a project, you can open that one too if you want to keep it together)
Then write the name, description of your project and click Create (top right corner)
The next page will take about 30 seconds to complete everything necessary for the website, such as the database. Once the process is finished, it will notify that project is created.
Step-3: Start creating a website
Open the project by double-clicking on it. It will take us to the dashboard of your project. To create the website, hover over the Contents(top navbar) and click Websites. Then New Website.
Step-4: Upload the Zip file and choose the main container
Write the website's name and choose the zip file( website or template), then click Upload Zip File( the one we created in the first section).
If you have multiple HTML pages ( such as index.html, about.html, contact), Flowize will ask you to choose the HTML file that you want to use as a template. In that case, select the main HTML page which you want to display first such as Index.html. Click Continue.
You have to choose the main container from the template. Select the container that will interact with the user. In simple words, we will use this container to inject different items into the website based on our flow.
In my case, It's the form Section.
Once you choose the main container, click save(top right corner)
Step-5: work with the editor
There is already an introduction to all the tools that we will be using in the editor.
You can find it in the documentation or Reference > Content > Website section https://kb.flowize.com/docs/reference/content/websites
Once you have the basic introduction, we start creating the website.
Step-6: Start creating the reusable blocks
We plan to create two pages. When the user visits the website, the other is when they submit the form on the page.
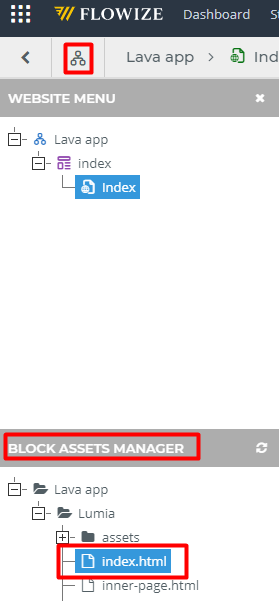
I will create one re-useable block for the second page that we will show after the form submission. To create a re-useable block, do the following steps- 1. Website Menu > Block Assets Manager > HTML File ( picture below)
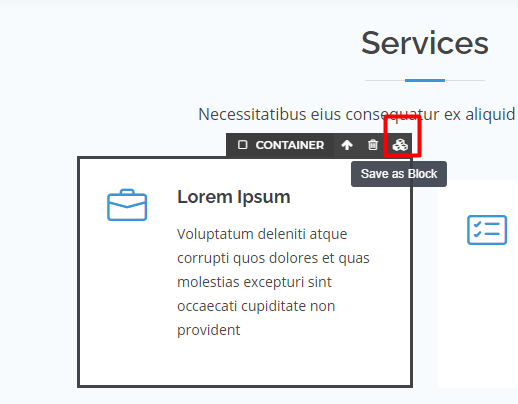
Scroll to the service section on your webpage and click on the container and click on the save as block (Picture below )
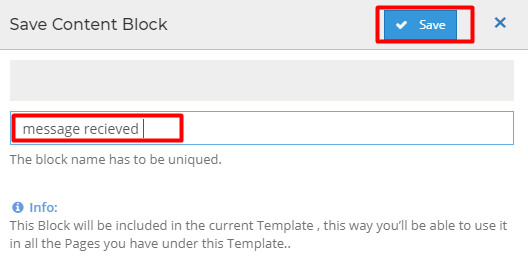
Once you click save. It will ask you to choose a unique name. Write a unique name and save it.
Step-7 Create a page
Click on Website Menu, then right-click on your main template HTML and click Add Page (picture below)

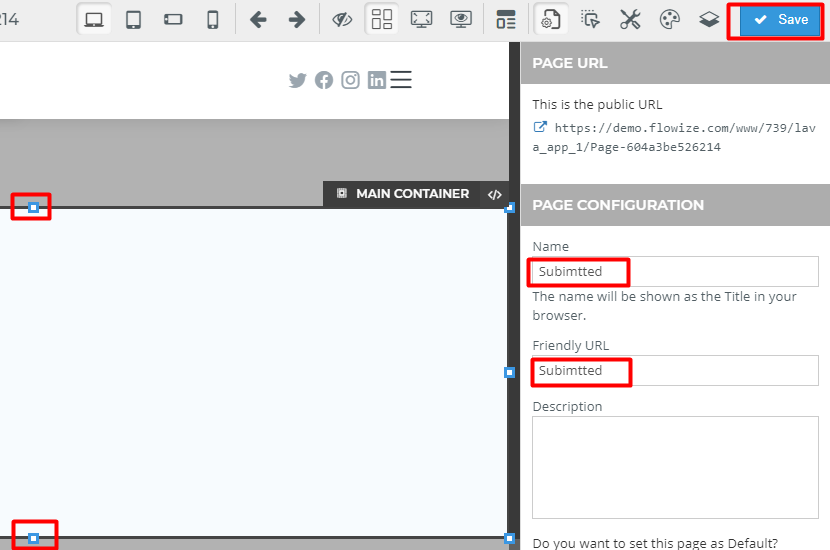
Then adjust the main container height by click and drag the blue box, then change the Name and Friendly URL and save
If you did everything right, you will have a URL with the name you choose. You can click and see
it.
Step-8 Customize page
We will use the block that we created in step 6 and use some other tools. Click on the website Blocks the Layout .
And select the layout you want. I will select the 3 Columns layout. then drag and drop it inside the main container
I will take the Website Block that we created before (step-6) and Drop it in the just created columns. Click save and take a look at the page by clicking content configuration and page URL. Do any customization that you like.
You have successfully created your page.
Step-9 Now, it's time for a bit of a challenge.
Your goal is to add a Form to the Index page. We have all the assets in the Block Assets manager. From there, you should create a block and then drop it on the index page.
Step-10 Start a flow from your page
Now we will customize our form submission and start a flow when the user submits the form.
In order to start a flow from the page first, we need to have a flow. Please Take a look at the flow section to learn more about flow and how to create. I am going to use this flow :
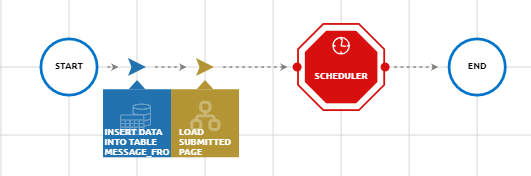
Explanation of this flow: when the user submits the button, We take Form data and save it to a Table, then we show them the submitted page.
First, go to the page from where you want to start the flow. I am going to use the Index page. Then click the form and add Name for all the inputs and buttons (click the input element and then click the Block Configuration Icon to do this). This will let you access the user's input as variables inside Flowize.
Now let's configure the submit button and add flow. First, click the button, then click the Block Configure tool and choose the options like below. Name of the Flow - Choose your Flow . Now click save.
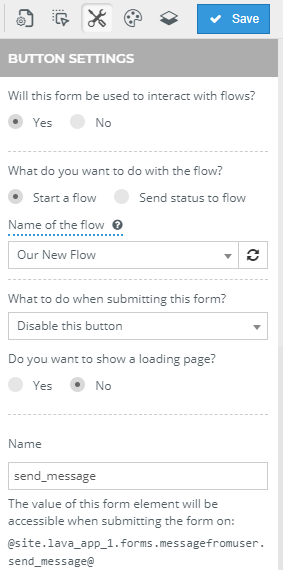
If you connect the flow and show them a different page from the flow, now this should work.
Step-11 Testing
Open your index page and click on the Content Configuration tool. Below you will find the link to your page. Visit the link and try submitting the form. After submitting, you should be able to see the submitted page?
Whenever you are testing, you should take a look at the Report to find problems easily.