In this example, we will show you how to print table data to your hosted page.
Project introduction
Let's imagine a situation where you have a table with all the invoice IDs and descriptions. You want to send an email to your client with all the invoice items from the table which has a particular Invoice_id.
Prerequisite
To accomplish this, we will use the global data, table data, Hosted pages, and also Email. If you do not know those, Please visit the following links to learn about those then you start with this one:
Hosted pages; Table; Data; Email
Our primary goal is to see how to print the table data on the hosted page; we will mainly focus on that.
Table creation
we are assuming that you have created a table before. If you do not know how to create - learn here.
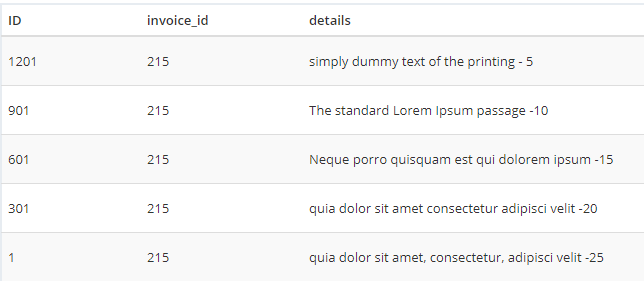
Let's pretend that this table stores all the invoice items. And we want to search the invoice for specific users using the invoice id.
The invoice_id will be an integer, and the details will be a string.

As there will be many item with the same invoice_id, i recommend creating more tables with the same invoice_ID. For
this project.
Global data creation
We need an email and Invoice ID to start our flow. So let's put them in the global data.
Add it by clicking storage top navbar then click data
and add Email and invoice_id.
My data looks like below.
Json:
{
"Email": "flowize.test@gmail.com",
"invoice_id": 215
}
Tree view :

In the production project, We will probably receive the data from an API. But to keep it simple for this project, let's use the global data.
Hosted page content creation
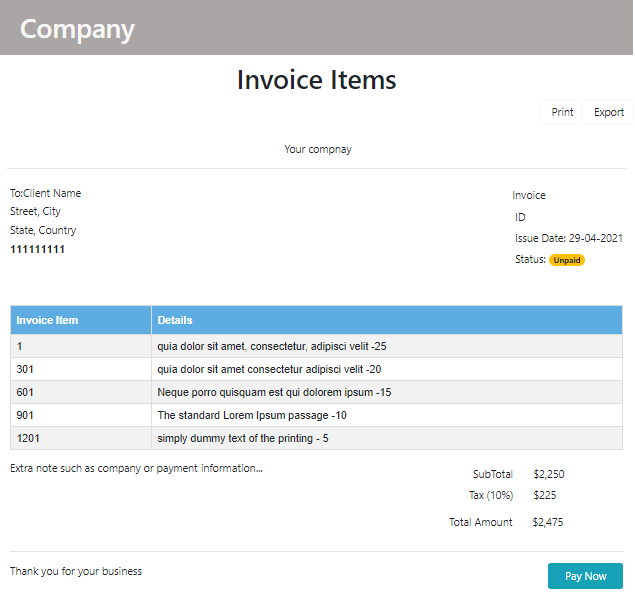
For this project, I am going to use this hosted page.
We are going to focus on the table in the page. As you already know, how to create a hosted page. You can create one similar to ours or just drag and drop a table. And start flowing with this project.
Add table data to your hosted page
To start adding the table data from in the page,click on the Row of your table like the picture below.
Make sure that you selected the whole row, not just one column.

If you selected the row correctly, clicking the block configure tool, you would see the TR setting appear. ( right side, under the block configure tool)
Click on yes for the question- Do you need to iterate this element?
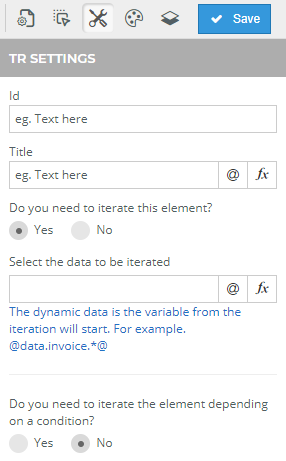
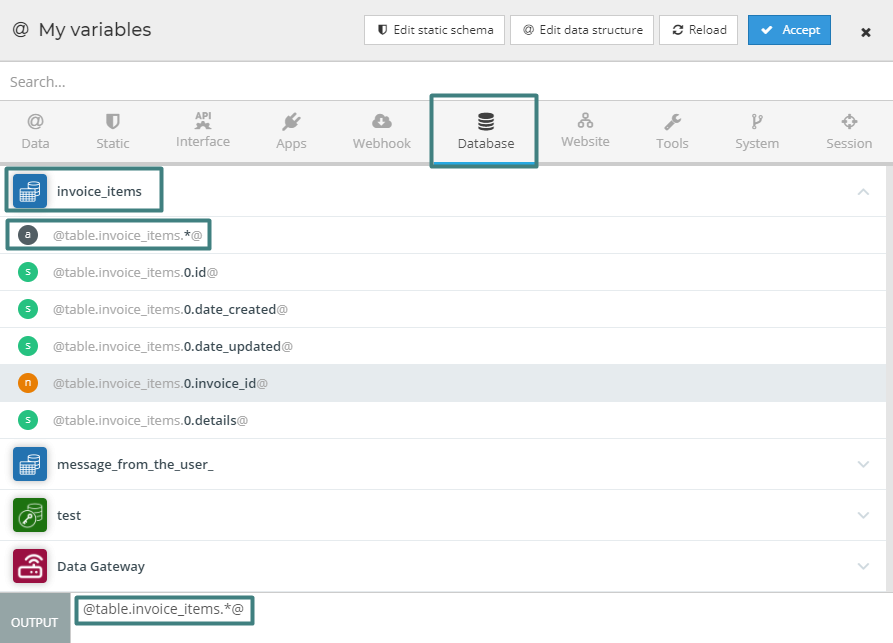
To make it iterate through the whole table, click on the variable @
This will bring a pop-up to add a variable.
Click on the database. And choose the table for this project. Then select the item first item where there is a *.
Click Accept. ( picture below)
Generally * means all the data of that table.
If you have selected all the variables properly, then it will iterate through all the data.
Now let's add those data to our row.
Click on the row(Not the whole row, only the specific table content where you want to show the table data )and click
the Edit Code <>

This will open a pop-up. Click on Tools then Varibales

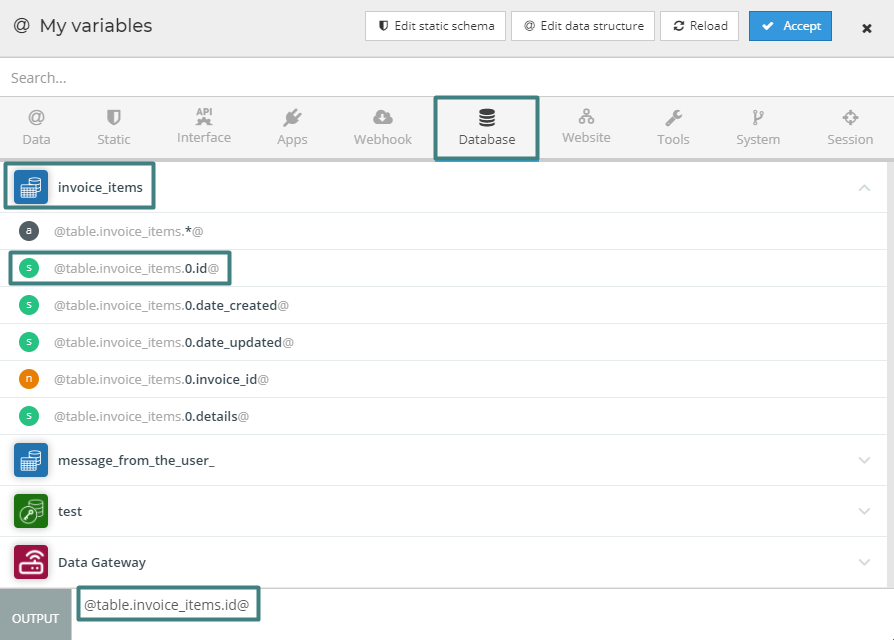
Then it will ask us for the variable. just like before you choose the all from the table,
this time use the @table.invoice_items.0.id@ or any other variable if you want to show in that place.
As we will iterate through all the data, remove the 0 and . and from the variable in the Output.(Picture below)
Do the same for the details Variables. In our case it is - @table.invoice_items.details@
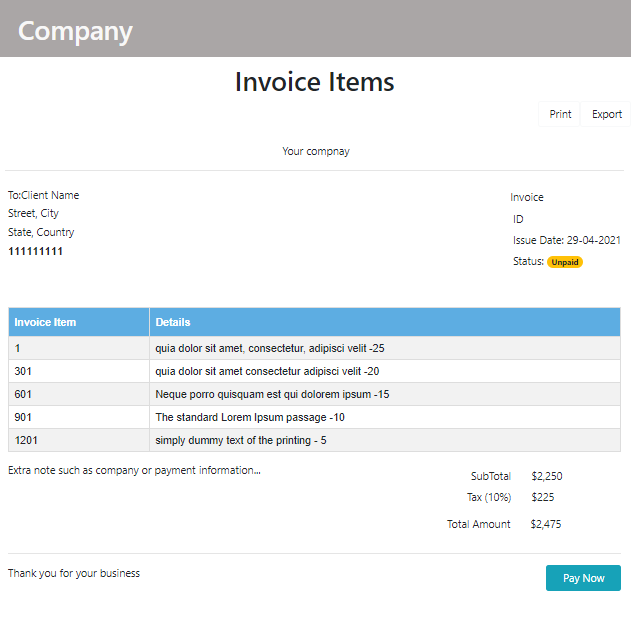
The final Look of the table:

Now save your hosted page and publish it.
Creating the Flow
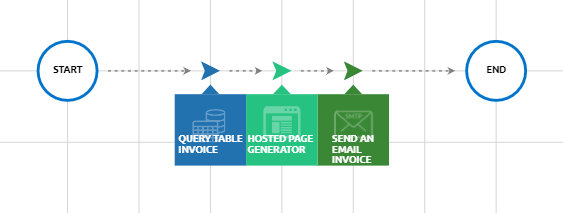
Now let's create the flow. Our flow needs three tools.
- Database Query to make the table data available for us to use in the flow.
- Hosted page Generator to generate an URL for hosted page
- Send an Email tool for sending an email.
All of these are available in flowize. So we do not need to create a custom app or install a marketplace app.
The overall look of the flow is below:
Query table
We need to use the database query to make the data available for the rest of the flow. We can add conditions here to give us the data we need instead of the whole database.
How to use it
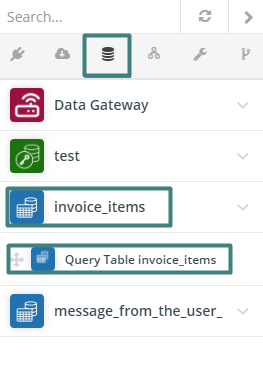
On the right side of your flow, click on Database And click your database for the invoice. Then it will show the Query Table invoice drag and drop it in your flow.
Now let's configure the tool. Double Click to open.
We want to see the all Tables which has the invoice_id same as the invoice_id of Global Data
Input parameters:
- Type of Query- Select *
- Conditions And
- Select the
invoice_idfrom your table by clicking the dropdown button. This shows all the column names from your table data. - Equal
- Select the variable
@data.invoice_id@from your global data by clicking The@.
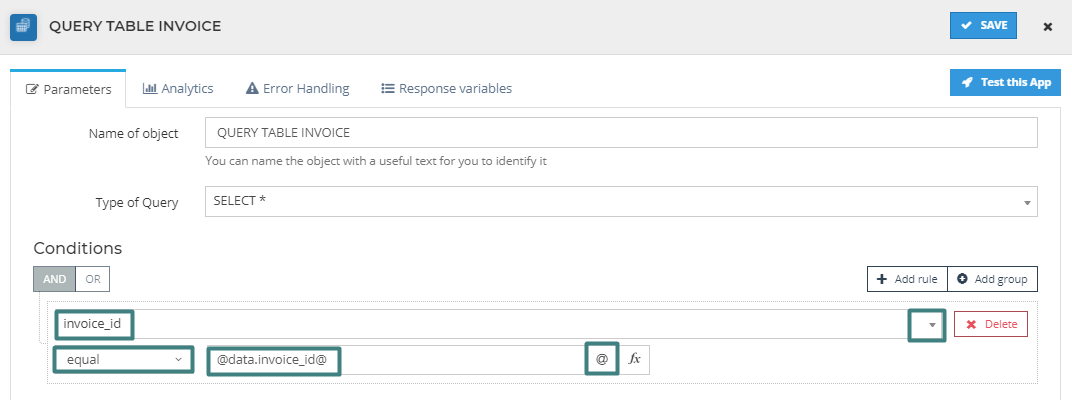
For creating conditions for your query, you always need to select the table data from the dropdown and a condition (equal/ not equal/ contains/ grater/ less etc ). On the second, the placeholder, you can put a number or word or variable. This is exactly what we did. Now click Save.
Test Query tool
If you did everything correctly in the previous steps, click test this app. In the response, you will see the ids of your table that match your global data invoice_id. This ids will be available in this flow for us to use.
our response look like this-
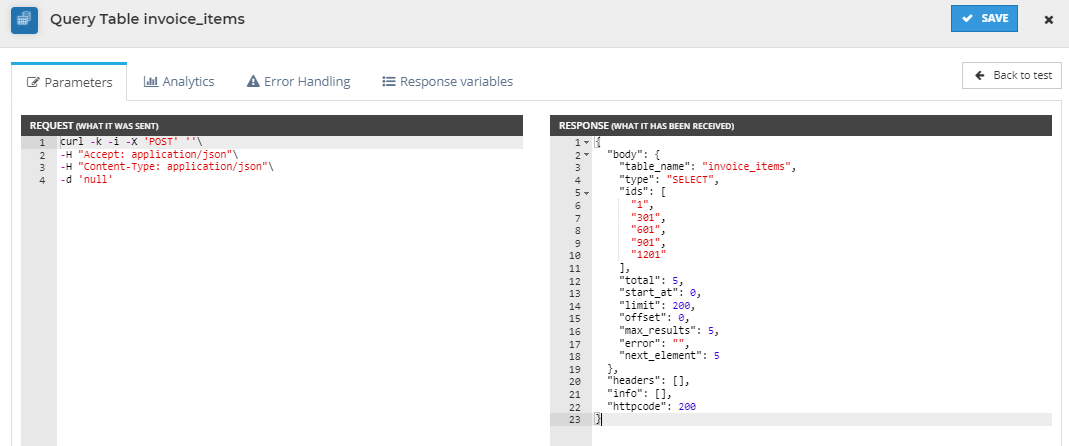
If you see the ids of your table that match your global data invoice_id. you can start following the next steps
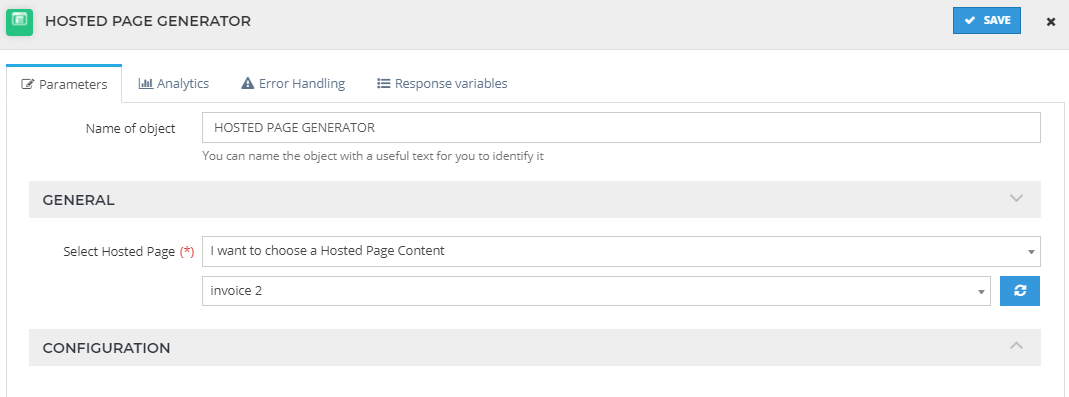
Hosted page generator
Let's generate the hosted page URL for the hosted page that we created earlier.
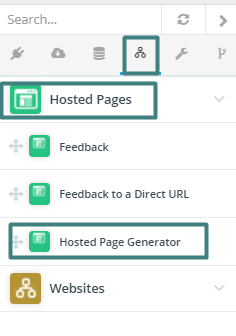
Click on the Hosted pages and it will dropdown tools and then drag and drop the hosted page Generator tool to your flow.
Configure the tool by opening it and Select the hosted page that we created earlier. Our hosted page name is - invoice 2
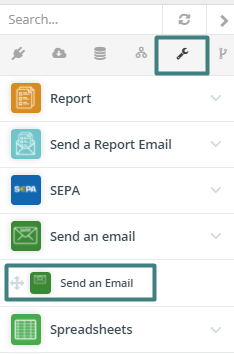
Email tool
There are many ways to send an email; depending on the email provider. In this case, we are going to use a Test Gmail account to send the email.
We have a tool called Send an Email. Drag and drop the tool in the flow.
Before we configure it, we need to have email content for this.
Email content creation
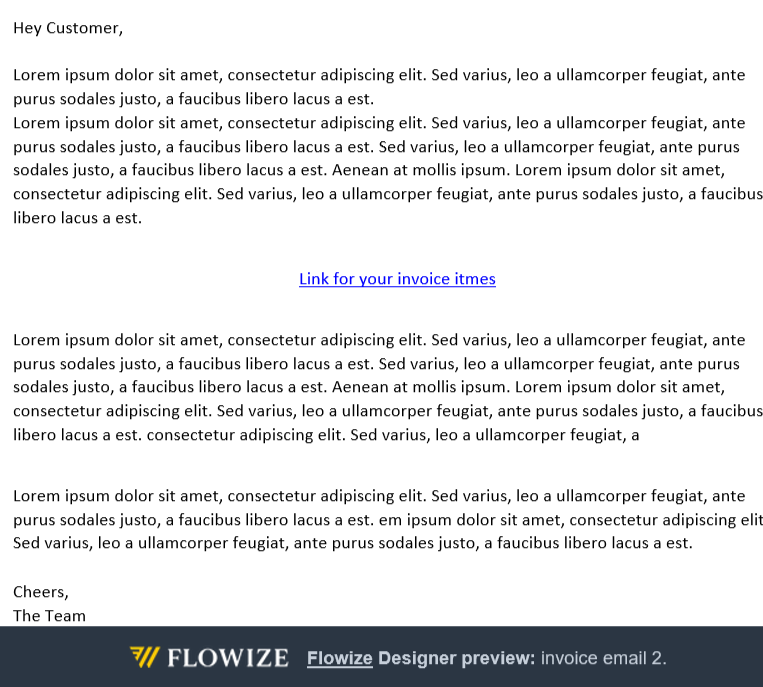
I am assuming that you already know how to create the email content. If not, learn here. I am going to use this one below:
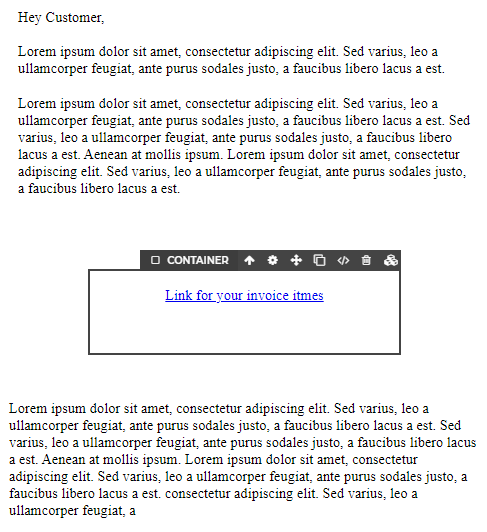
Let's add the Hosted page link for In the email content.
Click on the link in your email content.
You will see block the configuration tool on the right side.
For the Href, Click on @ to add variables.

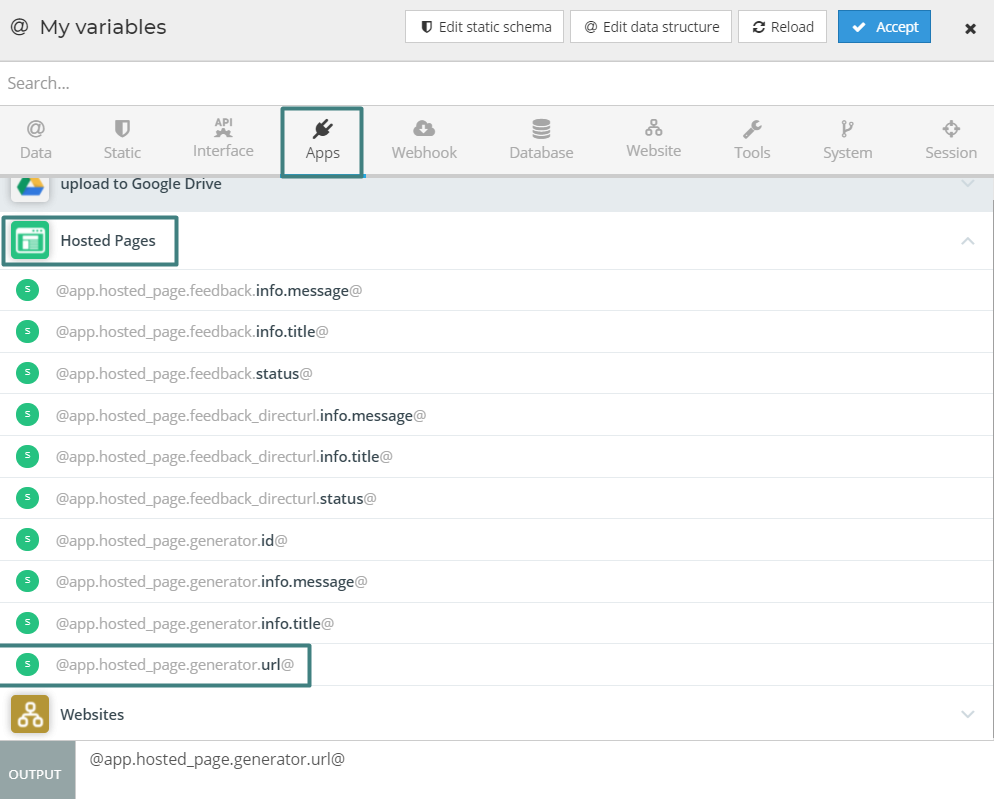
It will open the pop-up for adding a variable.
Click on apps > Hosted pages > @app.hosted_page.generator.url@ > Then Accept.
This is the response from the hosted page generator app, which is the link for our hosted page.
Click save
Configuring the email tool in the flow
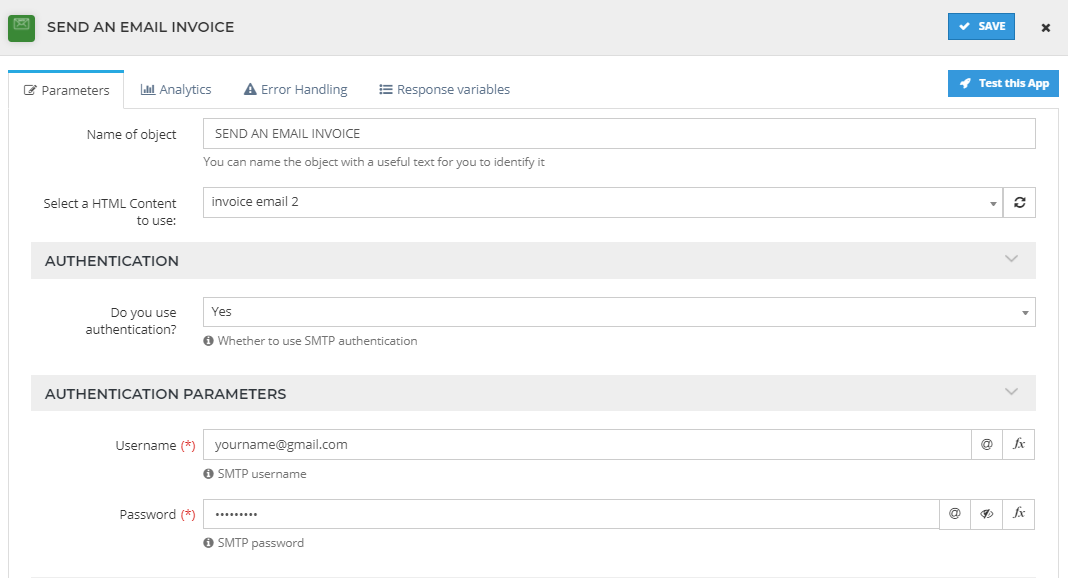
Go to your flow and open the SEND AN EMAIL INVOICE tool. We need to configure the tool to send email.
Write the name of the object and Choose the email content that we just created for the Select an HTML Content to use:
Input parameters :
| Section | For | Input |
|---|---|---|
| Authentication | Do you use authentication? | yes |
| AUTHENTICATION PARAMETERS | Username | Your email id (*@gmail.com) |
| Password | Your password for email |
| Section | For | Input |
|---|---|---|
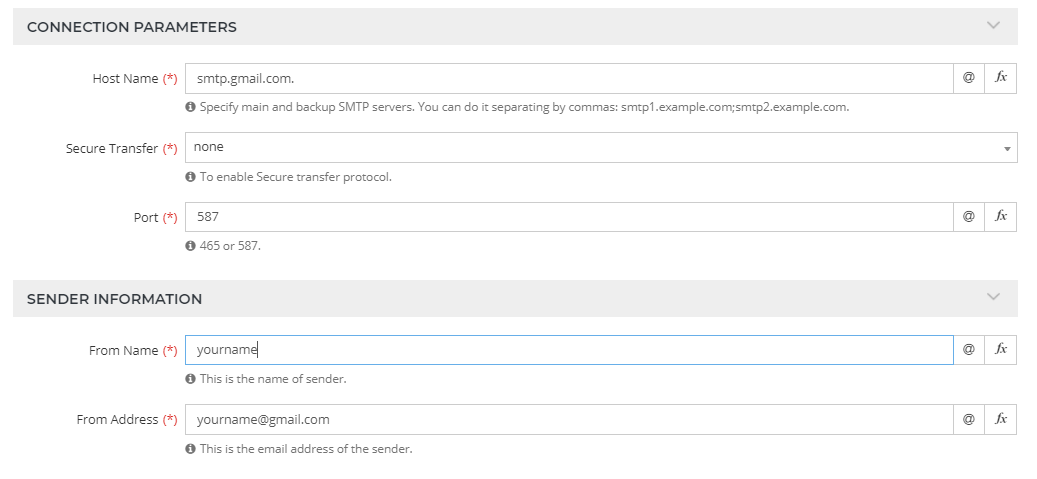
| CONNECTION PARAMETERS | Host Name | Host name for your provider. for gmail- smtp.gmail.com. |
| Secure Transfer | check for your email provider. for gmail- none | |
| Port | check for your email provider. for gmail- 587 | |
| SENDER INFORMATION | From Name | Your name |
| From Address | Your email id that you used for authenticating (*@gmail.com) |
| Section | For | Input |
|---|---|---|
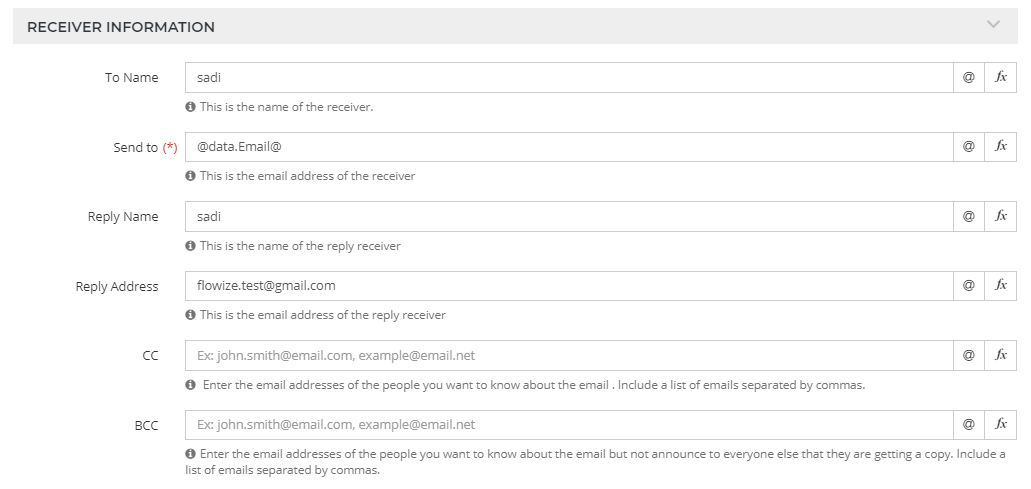
| RECEIVER INFORMATION | To Name | Add name of the receiver or Customer |
| Send To | Choose the variable from your data Email @data.Email@ | |
| Reply Name | Your name | |
| Reply Address | email address where you want the user to reply | |
| CC | If you want to add another email address for a copy | |
| BCC | send a copy without everyone knowing |
| Section | For | Input |
|---|---|---|
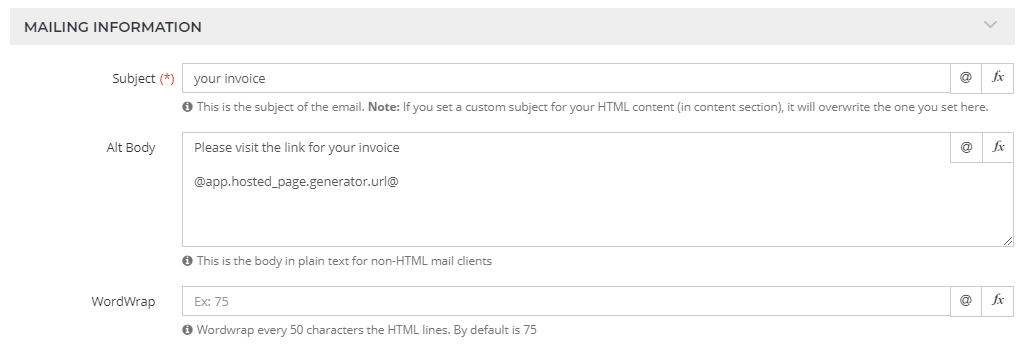
| MAILING INFORMATION | Subject | Subject of your email |
| Alt Body | This is the body in plain text for non-HTML mail clients |
Connect your flows and test it
Connect all the flows.If you have created all the tools correctly, You can test it now. If anything does not work the way it is supposed to, check the Report
After testing, I received the email like this-
And I clicked the link from the email. I see the hosted page with all the Invoice Items for the invoice id 215